
Search results can be exported from Gimmal Physical by following the steps below. This export can also be used as an ad-hoc reporting tool.
-
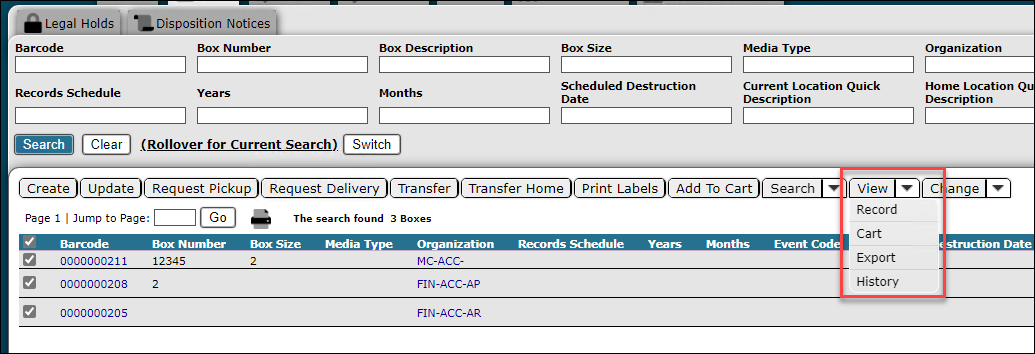
Execute a search on the desired tab in Gimmal Physical. You can then select individual records or export the entire search result set. If you need to export specific results from multiple pages of the result set, add them to your cart and they can be exported from there in the same way as described below.
-
Select Export from the View drop-down menu to bring up the Export Home Page Grid. The Export option may be in a different location depending on your specific implementation.
-
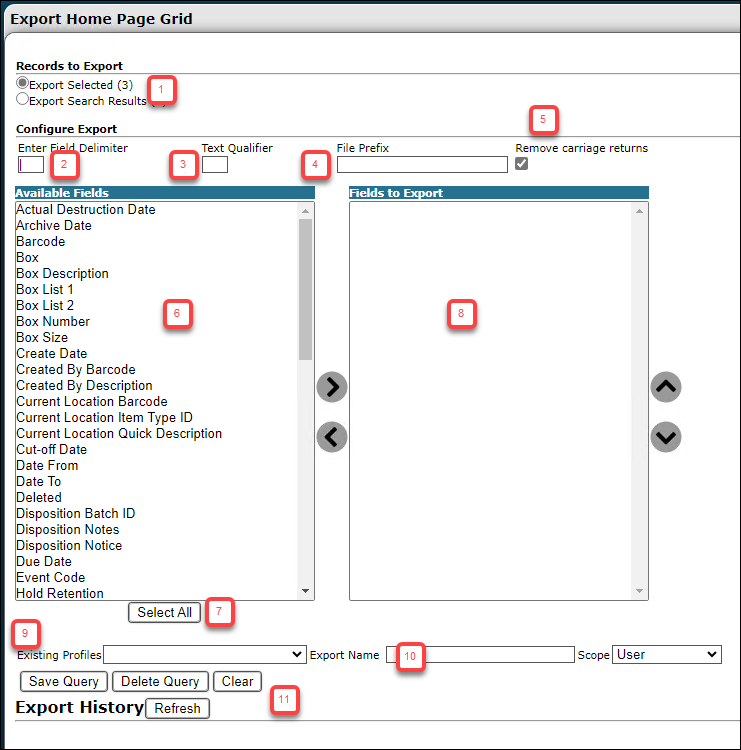
The first two radio buttons allow you to choose between exporting the individually selected records or the search results as a whole.
-
Field Delimiter - Separates the exported data fields. If left empty the pipe | is used. Make sure that you do not use a character that is in your data! If this is unavoidable, make sure to use the Text Qualifier.
-
Text Qualifier - Escapes the Field Delimiter, if it exists in your data, by wrapping text fields in a second special character.
-
File Prefix - Optional text that precedes the exported file name (automatically generated).
-
Remove carriage returns - Removes extra line breaks that might be found in the data.
-
Available Fields - Available fields to export based on the selected search results. Select one or more fields and click the right arrow.
-
Select All - Moves all Available Fields to Fields to Export.
-
Fields to Export - Fields included in the export file. These can be reordered by selecting fields and using the up/down arrows or removed by selecting and clicking the left arrow.
-
Existing Profiles - Previously saved lists of fields to export that can be reused.
-
Export Name - Save name for the current Fields to be Exported configuration (used with Save Query). It can be found in the Existing Profiles dropdown once saved.
-
Save Query, Delete Query, Clear
-
Save Query - Saves the current Fields to Export configuration (export profile) for later selection in the Existing Profiles drop-down.
-
Delete Query - Deletes the selected export profile.
-
Clear - Removes all entries in the Fields to Export configuration.
-
-
After everything is configured as desired, click the Export button in the top right corner of the page. The file will appear below Export History at the bottom of the page. The exported filename is automatically generated and is based on the object type (e.g., Files or Boxes), current user, date, and time.
-
Refresh - Forces a refresh of the Export History.