
Discovery Attender provides tools within Results Management views that allow users to further refine their results by using organizational features such as labels, notes and, today’s topic - Filters.
Standard Filters restrict a list by only showing results which match a predetermined set of criteria.
Standard Results Filters
Any view listing individual results, including All Results and Unique Items, will include standard filters. The toolbar will contain a set of default filters for result types. Additionally, the toolbar and context menus will include a button or menu item called ‘Filter’, offering additional choices.
Toolbar Menu
Default Filters
The toolbar has default filters which can be used to filter by result type. Click on the associated option to enable or disable the ‘show’ option for that type. Please note, by default all types are enabled and shown in the result list. Clicking the associated menu button will remove the type from being shown in the view. Clicking it again will repopulate that result type:
-
Messages

-
Attachments

-
Files

-
SharePoint objects

-
SharePoint files

Menu Filters
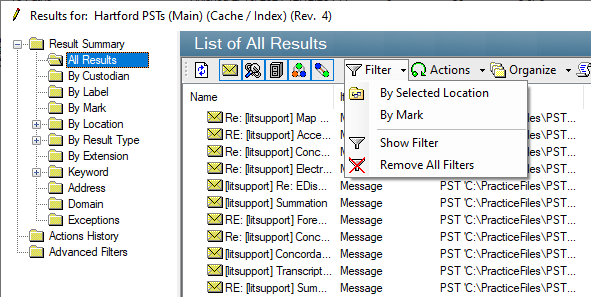
Clicking on the Filter menu item will show four choices for standard filters:
By Selected Location
Restricts the set of items being shown in the chosen view to ONLY those items which match exactly the source location of the first selected result. This can be a PST, Mailbox or Folder Path
By Mark
Gives users the choice of which identifying icon(s) should be used to restrict the result set.
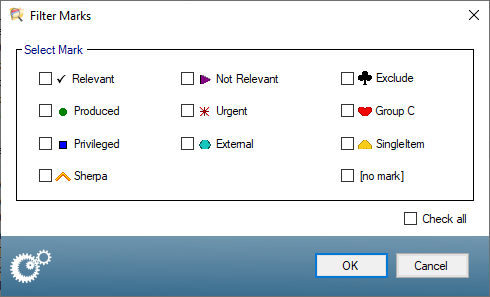
Marks are fixed icons that can be associated with individual results using a variety of methods. Once an item has be Marked with an icon, a filter can be used to pinpoint just the results which may be of interest. Items that are Marked will have associated text (configured in the Settings) appear on reports. There is a separate view called By Mark which groups items by their associated Mark.
To assign a mark to selected items, highlight the result(s), then choose Organize | Mark | [Icon] option from the Context menu. Alternately, from the toolbar, choose Organize | Mark. Values in certain views such as Domain or Address can also be marked as a group.
Please Note: Each result can have only one mark at a time.
To use the filter for the Mark, select the icon or icons (or [no mark]) to show and click ‘OK’. Only the results with the chosen mark (or [no mark]) will then be shown in the view.
Filter Options
Show Filter reveals the current filter in use for this view.

Remove All Filters will return the view to its original state, removing all constraints.
Aside from the Standard Filters described above, Advanced Filters are also supported in Discovery Attender. These filters use a wizard interface to apply criteria to show the select set of results in a new view.
Don’t hesitate to contact support if you have any questions.
First Published March, 2024