
What is a Trigger and a Retention?
Triggers are what cause a lifecycle phase to begin. You use a Trigger as a building block for defining another type of entity called Retentions. The Trigger, together with the Retention and Lifecycle Action, make up the Lifecycle Phase.
A Retention period is simply a period of time after a trigger begins. Retentions are measured in days, weeks, or years.
Gimmal Records supports several types of triggers. The four types are:
-
Date – Any date property, including custom metadata properties, can be used as a trigger. The trigger begins when the date is reached.
-
Rule – a property evaluates to true. For example, Status = Completed
-
Event – These can be recurring such as the end of the year or specific to an event instance such as employee termination
-
Special - Predefined triggers for dates that can be assigned to items dynamically according to user interaction
Creating Triggers & Retention
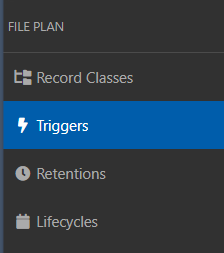
To create a new Trigger or retention, you would go to Plan in the ribbon menu. When you click Plan, the File Plan navigation shows up on the left side of the screen.
Select Triggers to view, edit, or create triggers. You’ll be presented with a list of existing triggers. The title and type of trigger will be displayed.
If you want to edit an existing trigger, simply select the pull-down menu and click Edit. From the menu, you can also view a triggers audit trail or delete the trigger.
To create a new trigger, click on one of the trigger types at the top of the screen.
Date Triggers
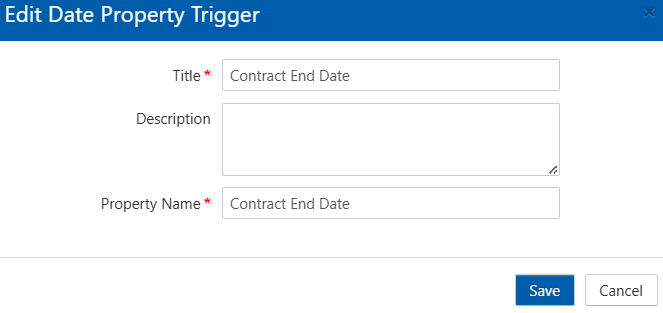
For a date trigger, you enter a descriptive name and a description. Then you enter the record property to evaluate. The property can be a system property such as @created or @modified. But it can be a custom date field like the example shown.
Rule Triggers
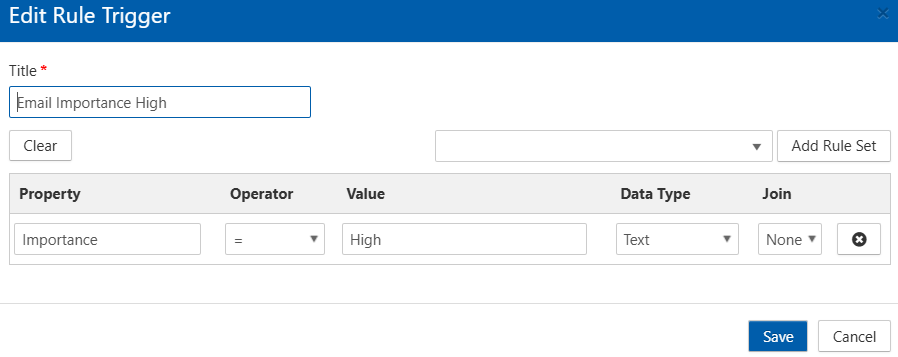
Rule triggers evaluate a property using the same operators as Classification Rules. You can use Rule Sets, and you can have multiple conditions joined with an AND or an OR clause.
Enter a descriptive title for the Trigger. Then enter the property name, select the operator, and enter the matching value for the property. In this example, we’re testing the property Importance to see if it is equal to the value ‘High’. If it is, the trigger is true, and retention begins.
Event Triggers
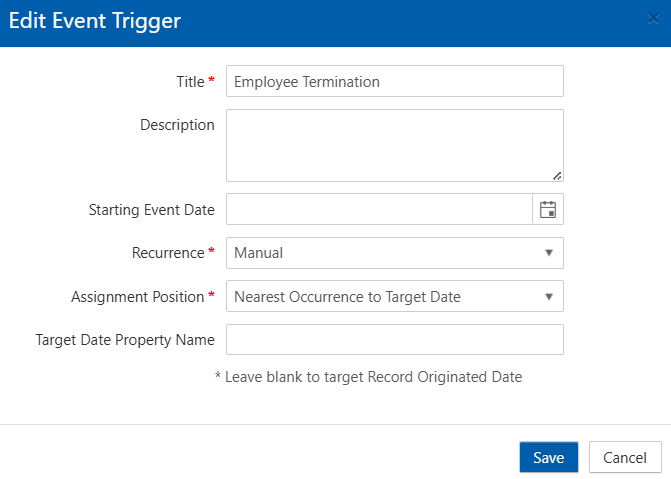
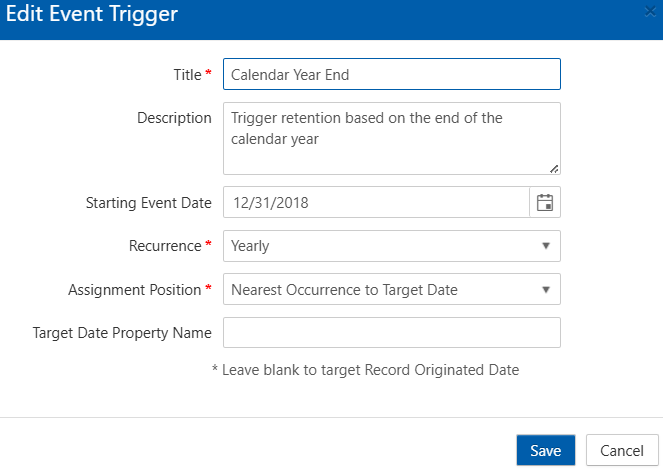
Here are two different examples of Event based triggers. The left one is a manual event trigger (Employee Termination), and the right one is a recurring event trigger (Calendar Year End).
For the recurring trigger, you simply enter the start date of the event and how often it will occur. Then Gimmal Records will automatically generate a new event occurrence at that interval.
A manual trigger is a bit different. After creating the Event, you then have to create specific occurrences of that event to begin retention on a set of records.
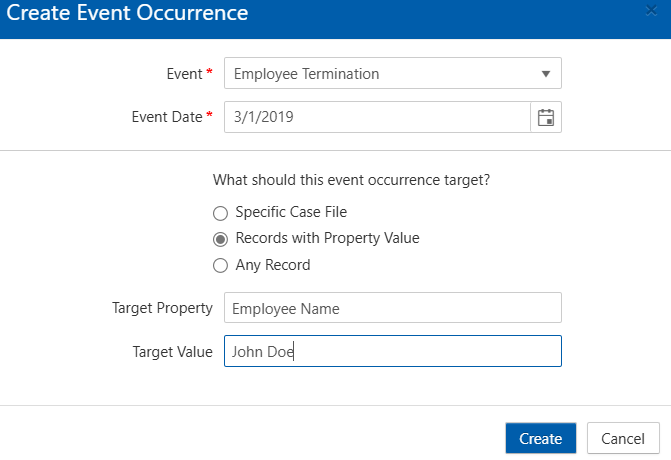
For example, John Doe is terminated on 3/1/2019. We selected the Event type and set the effective date to 3/1/2019.
Now we specify how to identify the records affected by this event instance. We are using a record property, Employee Name = John Doe.
If you have case-based records classes, you can specify a specific case file.
Special Triggers
Special triggers are pre-defined in Gimmal Records and cannot be created. Each trigger type presents a form. You enter the required information for the type of trigger you are creating.
Retentions
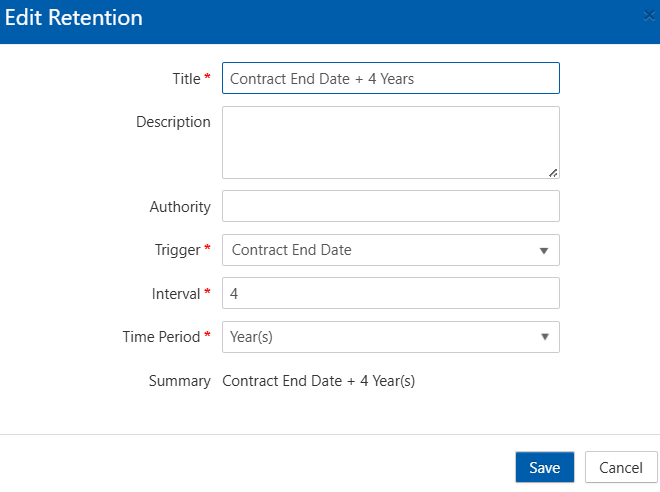
Triggers are reusable, so you can create multiple retention scenarios using the same trigger. Simply click +Create, then enter the required data in the form to create a new retention.
The title and Description should be descriptive. Authority can be a reference to why the particular retention is used.
Trigger is a pull-down list of all available triggers. Interval is how long the retention is, measured by the Time Period (days, weeks, years).
Please contact technical support with any questions.
First published November, 2024