
Several features in Gimmal Records require an understanding of Users and Groups and their related Roles. Read on for details about this basic functionality.
Accessing Account Information
To see, edit, or create new accounts you must be logged in as the System Administrator. From the Ribbon, select the Secure option.
Type of Accounts in Gimmal Records
Having an account lets your users log in, have permissions assigned for specific record classes, be part of filter groups, and participate in approval workflows. It’s their identity in Gimmal Records.
To see the full breadth of accounts in Gimmal Records, you will need to be a System Administrator.
Once you are on the Secure, page you can view all the user accounts defined in your Gimmal Records environment. User accounts allow access to Gimmal Records. When accounts are created, they are one of three types:
-
Master Account – has full control over all of Gimmal Records and can administer the system
-
User Accounts – the most common account. A User account will have varying access to the system depending on the role(s) it is assigned
-
Service Accounts – these are used for authenticating services like Gimmal Records connectors. They cannot be used to log in from the main Gimmal Records screen
To learn more about account types, visit our online documentation.
Roles in Gimmal Records
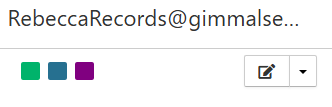
Every account in Gimmal Records is assigned a role. The colored boxes in each user profile indicate the type of roles assigned. A user may have more than one role assigned to them.
To assign a role to a user, click the Edit box in the lower right of the users card. This brings up a dialog box where you can fill in the users contact information and select their roles.
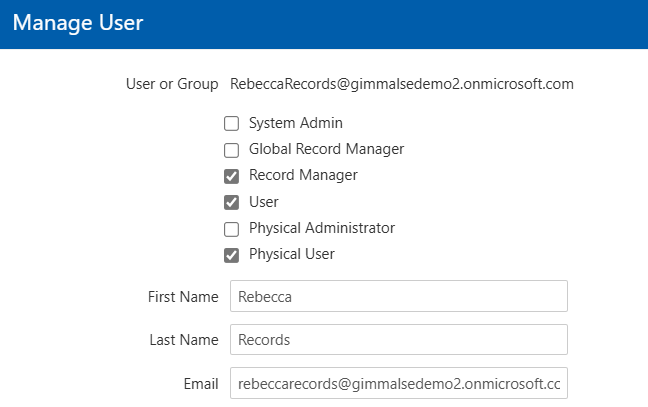
For Rebecca Records, we entered her name and her email address. The email is used for any notifications that include Rebecca. We have selected the roles of Record Manager, User, and Physical Records users.
Note: You will not have Physical roles if you are not licensed for the Gimmal Records Physical Records Management module.
Each role has specific access to Gimmal Records. Depending on your role, some functions in the ribbon will not be available to you. For example, only System Administrators can access the Secure function.
For a full description of each role, visit our online documentation.
How to use Groups
Groups are useful when you want to assign permissions or workflow approvals to more than one user. It makes maintenance easier when users are added or leave because you can simply edit the group once, rather than changing all your workflows or permissions.
For example, you could have a group called Local Records Managers, or a group named First Level Approvers. You then assign users to the group and use the group name for assigning permissions to a record class.
Let’s look at editing a group. Here we have two groups: Final Disposition Approvers and First Level Approvers.

If you select the pull-down menu in the group card, you can see the group membership and add or remove members from the group.
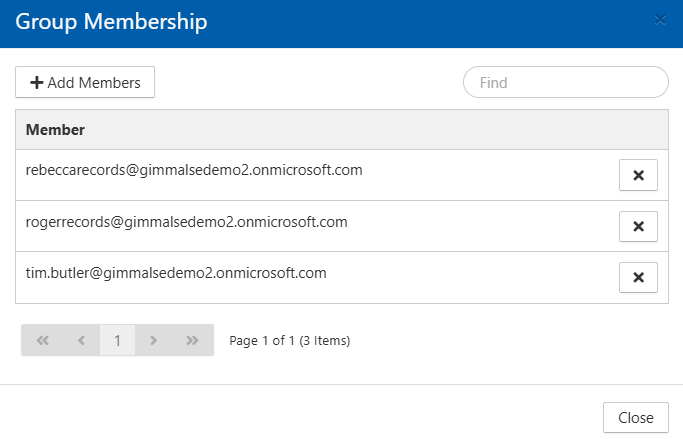
Rebecca, Roger, and Tim are all members of this group. To remove any member, simply click the X to the right of their name.
To add a new member to the group, select +Add Members at the top. A dialog box appears and you can type in the username of each user you want to add to the group.
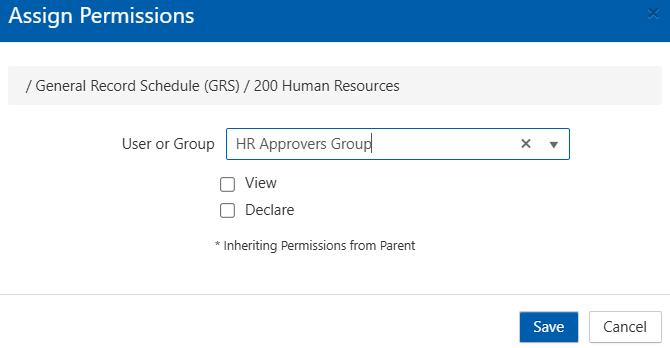
Once your group is defined, you can then use it anywhere you’d select a user. In this example, we’re giving HR Approvers permission to access record class 200 Human Resources.
Please contact technical support with any questions.
First published August, 2024