
Understanding Transfers in Gimmal Physical:
The process of relocating records within Gimmal Physical—whether it's checking them in/out or transferring them between individuals—is termed a Transfer.
Methods of Execution:
You can execute transfers through:
-
The application interface (covered in this tech tip)
-
Barcode scanners (refer to our online documentation for details)
Getting Started with Transfers:
Before diving into the transfer process, it's essential to familiarize yourself with relevant settings and information.
-
Navigate to the “Boxes” tab and click on "Transfer" to proceed.
-
To check out a box, you'll need to populate the Transfer Destination text box with the unique ID (barcode) of the intended location. Here are your options:
-
Use the default value set in Preferences
-
Manually enter the ID
-
Select from Recent Transfer Destinations located at the bottom
-
Utilize the universal location control to search and choose the desired location

Selecting Destination:
When you select a location from the list, the Destination text box will auto-populate with the unique ID of your chosen location, e.g., Craig Carpenter.

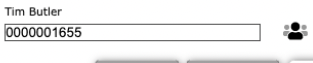
Exploring Alternatives:
-
Alternatively, you can opt for a different location using the universal location control, like selecting Tim Butler.
-
Once selected, the unique ID (barcode) of Tim Butler will appear in the destination text box.
Don’t hesitate to contact support if you have any questions.
First published March, 2024